


last updated on September 24, 2026
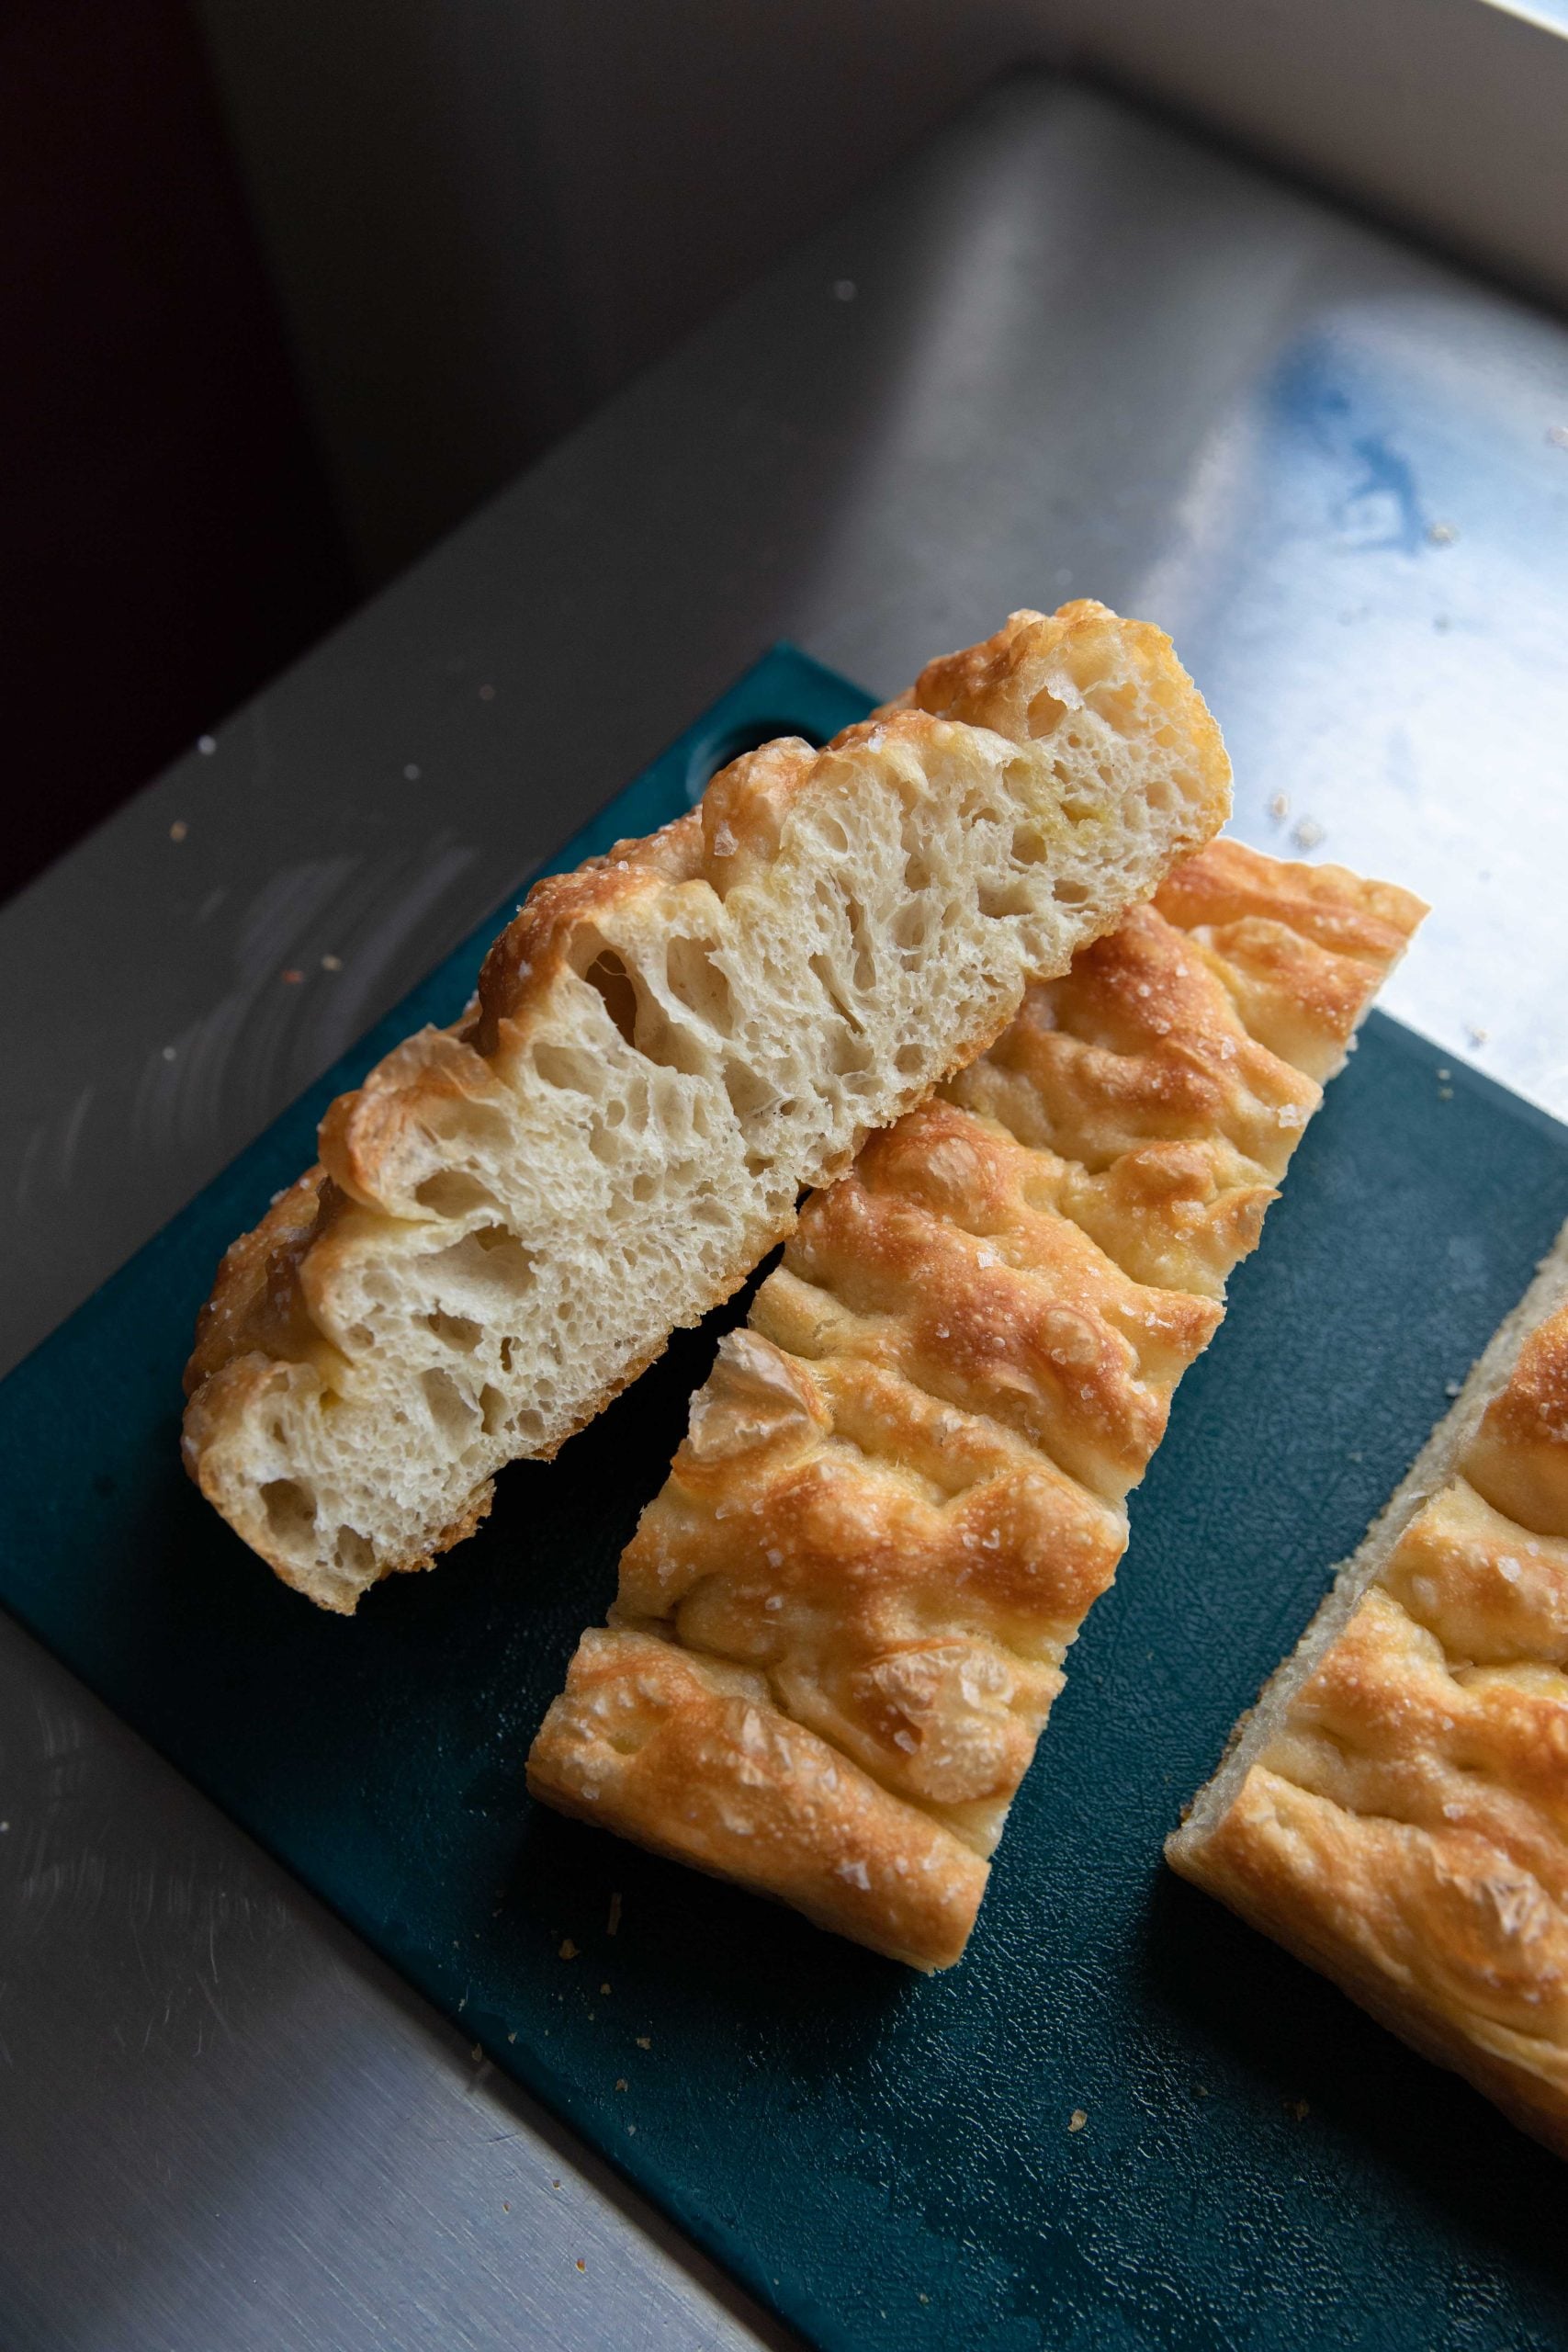
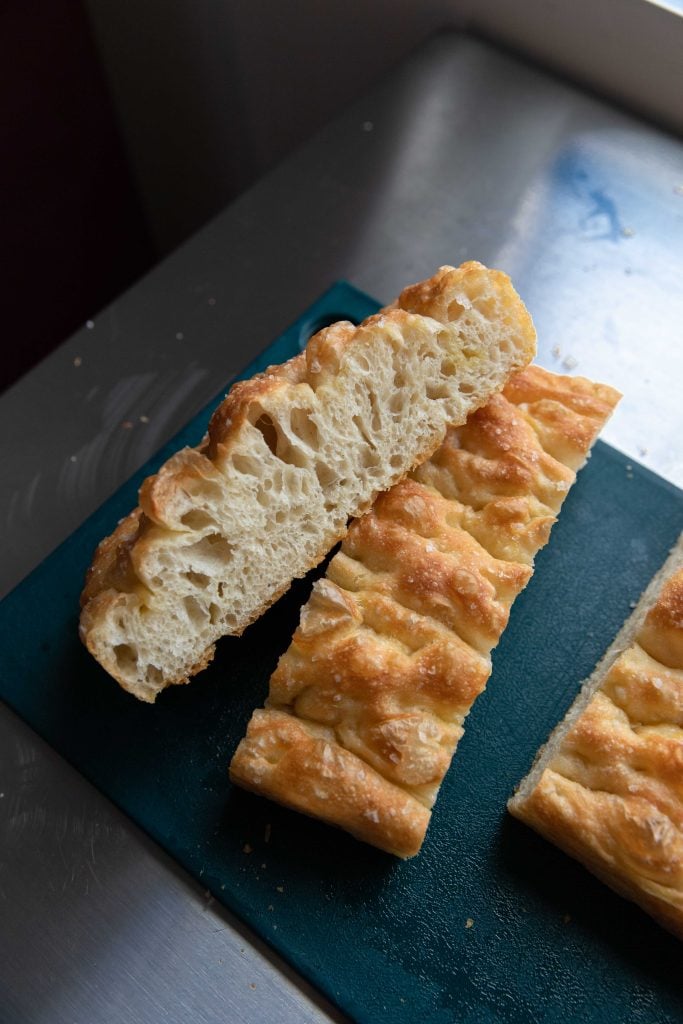
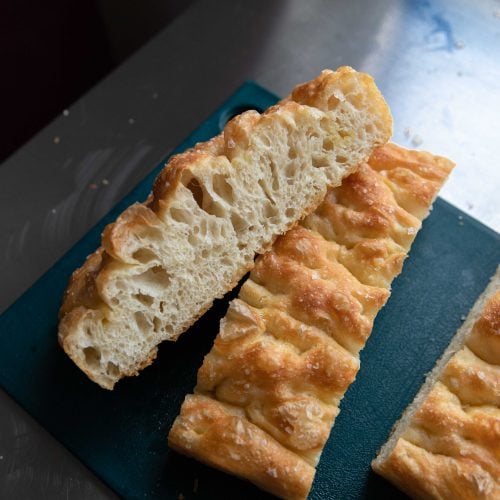
It’s easy to know I am obsessed with focaccia, and this is the best focaccia bread. The golden, olive oil-crisped edges, the airy interior full of beautiful bubbles, and the insane aroma of warm bread filling your kitchen!! Plus, in my opinion, it is the easiest bread to make with the highest return. It requires no stand mixer, no complicated shaping, and no advanced bread-making experience. All you need is a handful of pantry staples, a simple stretch-and-fold technique, and a few hours of resting time, and you’ve got bakery worthy focaccia on your hands.
One of the secrets to incredible focaccia is its high hydration dough. While it may seem unusually wet compared to traditional bread dough, that extra water is exactly what creates those signature air pockets and light, fluffy texture. Combined with plenty of olive oil and a hot oven, the result is crispy exterior and a fluffy, bubbly interior.
ingredients you’ll need for the best focaccia bread
One of my favorite things about this focaccia recipe is that it relies on just a handful ingredients you likely already have.
bread flour
Bread flour is my first choice because its higher protein content creates a stronger gluten structure. That stronger gluten helps support the high hydration dough, giving focaccia its signature chewy texture and beautiful air pockets. If you don’t have bread flour, all-purpose flour works too. Your focaccia will still be delicious, but it may have a slightly softer crumb and a little less chew.
instant yeast
Instant yeast is one of my favorite ingredients for homemade bread because it can be mixed directly into the flour—there’s no need to proof it first.
If you’re using active dry yeast, use the same amount (2 teaspoons), but dissolve it in the warm water for 5–10 minutes before mixing it with the dry ingredients.
salt
Salt does much more than season bread. It strengthens gluten, helps regulate yeast activity, and enhances the overall flavor of the focaccia.
I prefer diamond crystal kosher salt in the dough because it dissolves easily and distributes evenly throughout the mixture, but use whatever you’ve got on hand.
warm water
Water is what gives this focaccia its signature high hydration dough. At roughly 95% hydration, the dough feels much wetter than traditional sandwich bread, but that’s exactly what creates those beautiful open holes and soft, airy interior. Make sure the water is warm to the touch, but not hot. Water that is too hot can kill our yeast and nobody wants that!
olive oil
Olive oil is one of the defining flavors of focaccia. It keeps the crumb tender and helps create those perfectly crispy golden edges.
You’ll use olive oil for several steps:
- Greasing the baking pan
- Coating the dough before its second rise
- Drizzling over the top before baking
Don’t be afraid to use a generous amount, and use high quality stuff because you’ll be able to taste it!
flaky salt
A sprinkle of flaky sea salt just before baking is the perfect finish for focaccia. It gives an extra punch of salt on each bite and that is my ideal situation.
My favorite options are Maldon or another flaky finishing salt, but any flaky sea salt will work beautifully.
why i recommend measuring in grams
Because focaccia is a high hydration bread, even small differences in the amount of flour can noticeably change the dough. Using a digital kitchen scale makes sure you’re getting the correct flour-to-water ratio every time, which leads to a lighter crumb, larger air pockets, and the best focaccia bread every time.
I’ve included cups measurements in case you don’t have a scale yet, but please consider buying one! Your future baking self will thank you! The one I use is very inexpensive and will work for all your baking needs.
how to make the best focaccia bread
1. mix the dough
In a large mixing bowl, combine:
- 500 grams bread flour
- 2 teaspoons instant yeast
- 2 teaspoons salt
Whisk the dry ingredients together until they’re evenly combined. Pour in 475 grams of warm water and stir with a wooden spoon until no dry flour remains. The dough will look shaggy, sticky, and much wetter than traditional bread dough—that’s exactly what you want. Cover the bowl tightly with plastic wrap or a reusable bowl cover.
2. first rise with stretch and folds
Allow the dough to rise at room temperature for 2 hours. During those two hours, you’ll perform four rounds of stretch and folds, one every 30 minutes.
To perform a stretch and fold:
- Wet your hands slightly to prevent sticking.
- Grab one edge of the dough.
- Gently stretch it upward without tearing.
- Fold it back over the center of the dough.
- Rotate the bowl about a quarter turn and repeat.
- Continue until you’ve completed four folds around the bowl.
Re-cover the bowl and let the dough continue rising. Repeat this process every 30 minutes until you’ve completed all four rounds.
why stretch and folds work
Instead of traditional kneading, stretch and folds gently build gluten while keeping the dough really light and full of air. Each round you’ll notice the dough become smoother, stronger, and easier to handle.
3. transfer to the pan
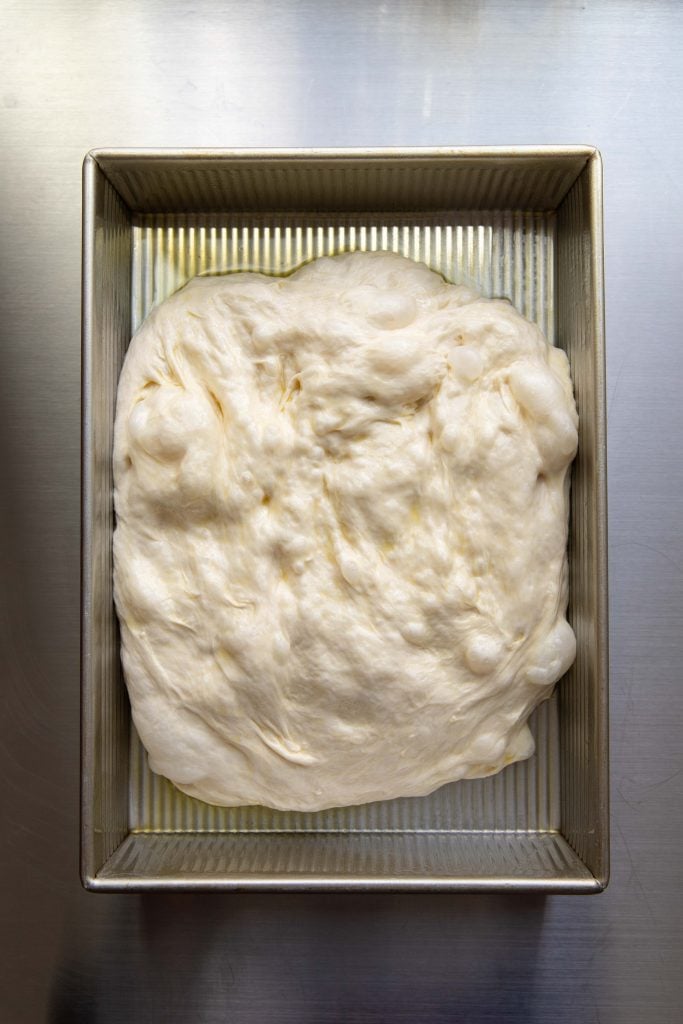
Generously coat a 9×13-inch baking pan with 1 tablespoon olive oil. Add another tablespoon of olive oil directly to the center of the pan. Carefully transfer the dough into the pan and gently turn it over so it’s coated in the olive oil on both sides.
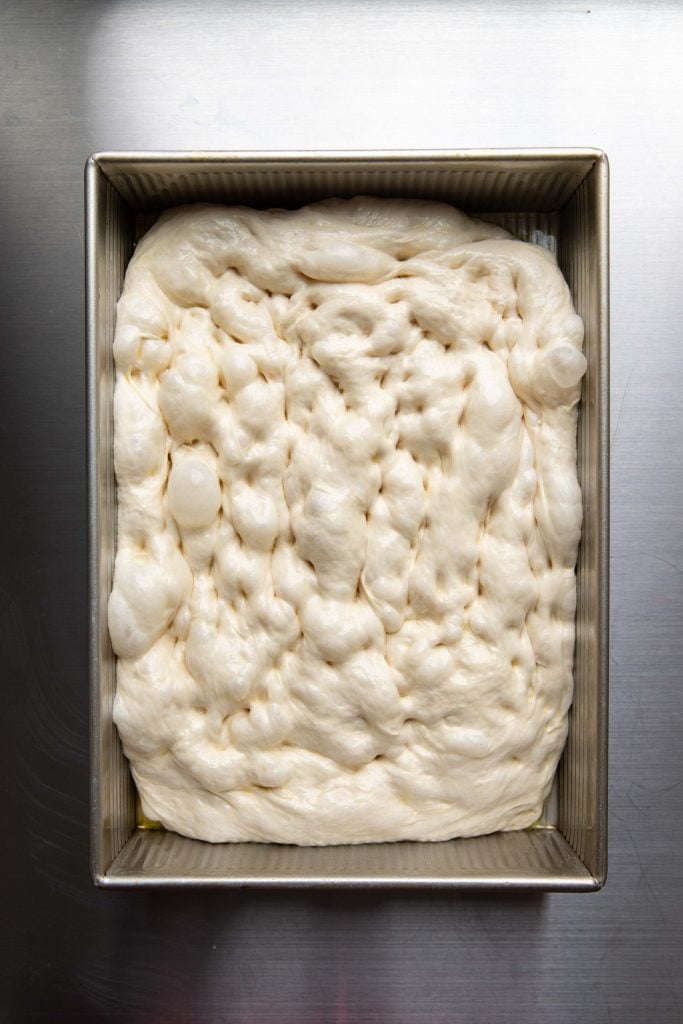
At this point, the dough probably won’t reach the corners of the pan—and that’s completely normal. Don’t force it. Cover the pan and let it rise for another 2 hours. During this second rise, the dough will naturally relax, spread, and fill much more of the pan on its own.
4. preheat the oven
About 20 minutes before the second rise is finished, preheat your oven to 475°F.
5. stretch, dimple, and top the dough
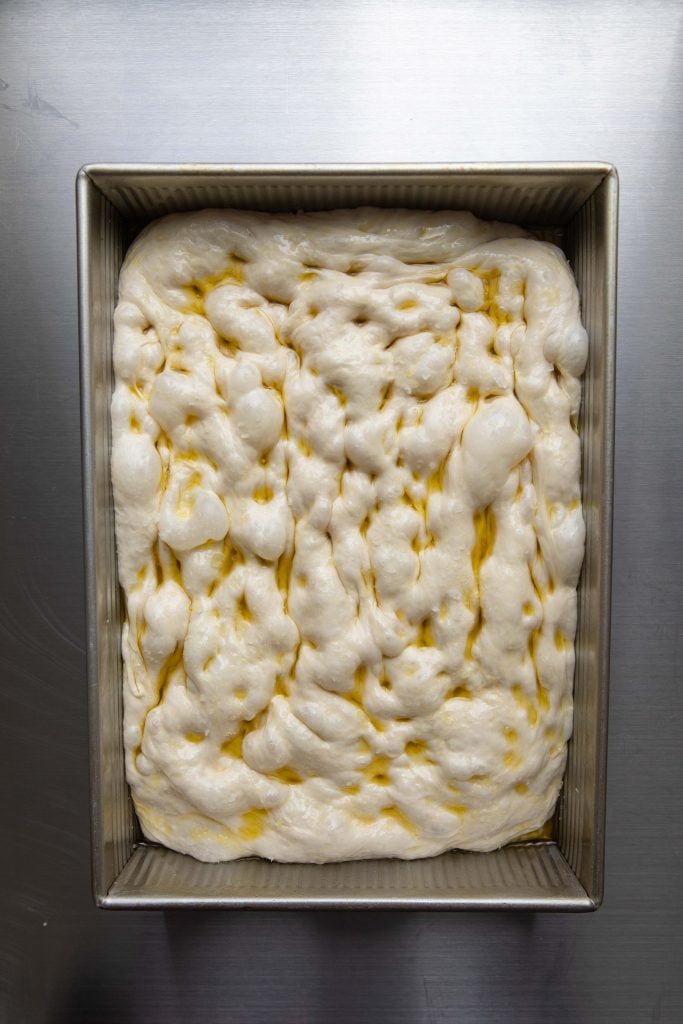
Once the dough has finished its second rise, drizzle the remaining 2 tablespoons olive oil over the surface. If the dough hasn’t completely reached the edges of the pan, lightly oil your fingertips and gently stretch it toward the corners. Be careful not to press out all of the air bubbles we’ve worked so hard to get!
Using your fingers, firmly press straight down into the dough to create dimples across the entire surface. Finish by sprinkling flaky sea salt evenly over the top.
If you’d like to add toppings such as fresh rosemary, roasted garlic, cherry tomatoes, caramelized onions, olives, or grated Parmesan, now is the time. Let the dough rest for the remaining 20 minutes while the oven finishes preheating.
6. bake until deeply golden
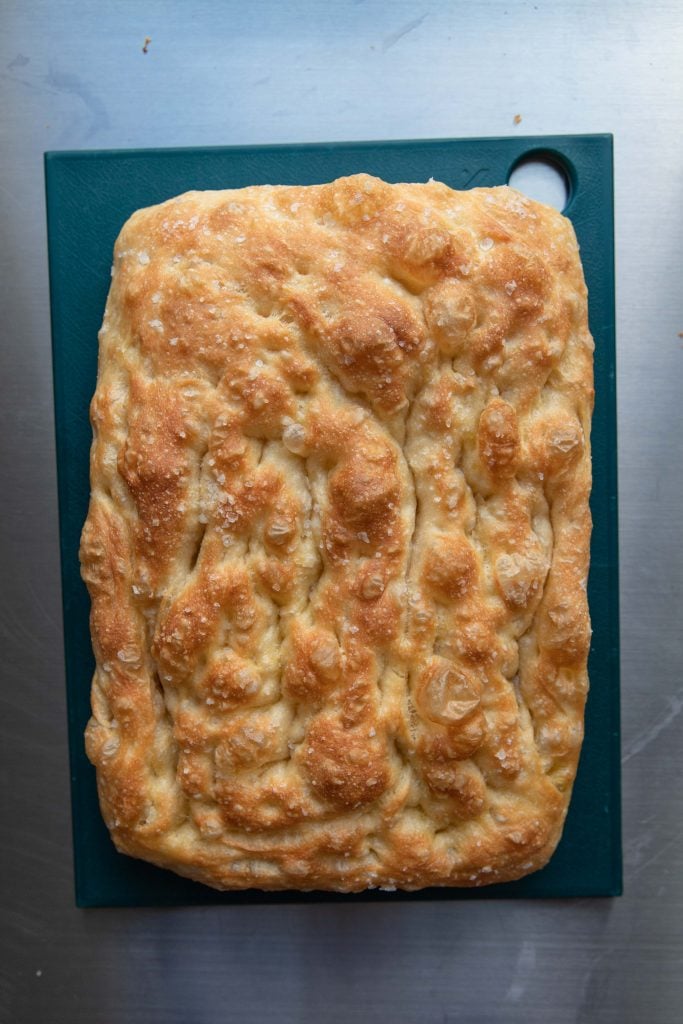
Bake the focaccia for 18–22 minutes, or until the top is a rich golden brown and the edges are deeply caramelized.
Every oven bakes a little differently, so start checking around the 18-minute mark. If you prefer extra crispy edges, let it bake for another minute or two.
7. cool before slicing
Allow the focaccia to cool in the pan for about 5 minutes. Carefully transfer it to a cooling rack to finish cooling. This prevents steam from collecting underneath the bread and helps keep the bottom crust crispy!
You’re going to want to slice into the bread immediately, but waiting another 10–15 minutes lets the crumb to finish setting and makes for cleaner slices. So a little waiting is worth it!
how to make the best focaccia bread overnight
One of the best things about this homemade focaccia recipe is that it fits easily into your schedule, really making this the best focaccia bread. If you don’t have four hours to dedicate to rising during the day, you can let the dough rise overnight in the refrigerator instead.
In fact, an overnight rise is one of my favorite ways to make focaccia because it gives the dough more time to develop flavor. As the yeast works slowly in the cold, the bread develops a deeper, slightly tangy taste and an even chewier texture. Plus sometimes its way more convenient to break up the process into two days.
option 1: refrigerate after the first rise (my preferred method)
This is my favorite overnight method because it gives the dough plenty of time to develop flavor while making it easy to finish the recipe the next day.
- Mix the dough as directed.
- Complete the 2-hour first rise, including all four rounds of stretch and folds.
- Transfer the dough to the oiled 9×13-inch pan and coat both sides with olive oil.
- Cover the pan tightly with plastic wrap or a reusable cover.
- Refrigerate for 8–24 hours.
The next day:
- Remove the pan from the refrigerator at least 2 hours before baking.
- Let the dough come to room temperature and continue rising until it’s noticeably puffy.
- If needed, gently stretch the dough to the edges of the pan.
- Dimple the surface, drizzle with the remaining olive oil, sprinkle with flaky sea salt, and bake as directed.
option 2: refrigerate after mixing the dough
If you’d rather prep the dough the night before and do the stretch and folds the next day, you can refrigerate it immediately after mixing. I rarely do this, but it can work!
Here’s how:
- Mix the dough until no dry flour remains.
- Cover the bowl tightly.
- Refrigerate overnight (8–12 hours).
The next day:
- Let the dough sit at room temperature for about 30–60 minutes to take the chill off.
- Perform the four rounds of stretch and folds every 30 minutes.
- Continue with the recipe as written.
This method is convenient, but I generally prefer refrigerating after the stretch and folds because the dough has already begun building strength before it goes into the refrigerator.
can the dough stay in the refrigerator longer?
Yes! This dough can stay refrigerated for up to 24 hours without any changes to the recipe.
If you need to keep it a little longer, it’s usually still fine for up to 48 hours, although the yeast will continue fermenting and the dough may become more delicate and slightly tangier. If it looks very bubbly, don’t worry—that’s a sign the fermentation is working!
how to store, freeze, and reheat focaccia
Like most bread, focaccia is best on the first day you bake it, when it’s nice and fresh. That being said, if you store it properly it will taste good for several days, even months if you freeze it! But in my experience it usually only lasts a couple days at most (because you’ll eat it so quick!).
how to store focaccia at room temperature
Store any leftover focaccia at room temperature. Once the focaccia has completely cooled:
- Wrap it loosely in plastic wrap, foil, or beeswax wrap.
- Place it in an airtight container or resealable bag.
- Keep it at room temperature for up to 3 days.
Don’t store your focaccia in the refrigerator if possible. The cold temperature causes the starches in bread to firm up more quickly, which will make your bread stale and nobody wants stale bread!
how to freeze focaccia
Focaccia freezes really well! So it’s a great bread to make extra of to prepare ahead of time. To freeze:
- Allow the focaccia to cool completely.
- Slice it into individual portions or larger sections.
- Wrap each piece tightly in plastic wrap or foil.
- Place wrapped pieces into a freezer-safe bag or container.
- Freeze for up to 3 months.
Freezing individual slices makes it easy to enjoy homemade focaccia whenever a craving hits. You can pull out just what you need instead of thawing the entire loaf.
how to thaw frozen focaccia
- Remove the focaccia from the freezer.
- Let it thaw at room temperature for 1–2 hours.
- Reheat before serving if you want to restore the crisp crust.
If you’re short on time, individual slices can also be reheated directly from frozen.
how to reheat focaccia
oven method (my preference)
- Preheat the oven to 350°F.
- Place focaccia directly on a baking sheet.
- Warm for 8–10 minutes.
This helps revive the crisp edges while keeping the center soft and fluffy!
air fryer method
- Heat the air fryer to 350°F.
- Warm focaccia for 3–5 minutes.
This method creates extra crisp edges, especially for smaller pieces.
other recipes you’ll love
- cheesy garlic chive focaccia
- carrot, scallion, and white cheddar biscuits
- the perfect blt
- single serve biscuit with strawberries and cream
- apple cinnamon pull-apart bread
the best focaccia bread
Ingredients
- 500 grams bread flour about 4 cups + 2 tablespoons, or all-purpose flour
- 2 teaspoons instant yeast
- 2 teaspoons fine sea salt
- 475 grams warm water about 2 cups
- 4 tablespoons extra virgin olive oil divided
- Flaky sea salt for topping
Instructions
mix the dough
- In a large bowl, combine the bread flour, instant yeast, and salt. Stir until evenly mixed.
- Add the warm water and stir with a wooden spoon until a shaggy dough forms and no dry flour remains.
- Cover the bowl with plastic wrap or a reusable cover.
complete the first rise
- Let the dough rise at room temperature for 2 hours.
- During the first rise, complete four rounds of stretch and folds:
- Perform the first stretch and fold after 30 minutes.
- Repeat every 30 minutes until you’ve completed four total rounds.
- To stretch and fold, grab one edge of the dough, stretch it upward, and fold it toward the center. Rotate the bowl and repeat until you’ve folded all four sides.
transfer dough to the pan
- Grease a metal* 9×13-inch baking pan with 1 tablespoon of olive oil.
- Add another tablespoon of olive oil to the center of the pan.
- Transfer the dough into the pan and gently turn it over to coat both sides with oil.
- Cover and let rise for another 2 hours.
preheat the oven
- About 20 minutes before baking, preheat the oven to 475°F.
dimple and top the dough
- Lightly stretch the dough toward the corners of the pan if needed.
- Drizzle the remaining 2 tablespoons of olive oil over the dough.
- Using your fingertips, press deep dimples throughout the dough.
- Sprinkle evenly with flaky sea salt.
- Let the dough rest for the remaining 20 minutes while the oven finishes heating.
bake the focaccia
- Bake for 18–22 minutes, until the focaccia is deeply golden brown and the edges are crisp.
- Let cool in the pan for 5 minutes, then carefully transfer to a cooling rack.
- Allow it to cool slightly before slicing.






What brand of bread flour do you use please?
i buy my flour in bulk from a local mill, but if i’m not buying in bulk i like king arthur!
Best recipe in the game! I would, however, bake with parchment underneath and just oil your parchment according to her recipe. Just to ensure it doesn’t stick to the pan!
hi! yes, depending on what pan you are using, some parchment paper might be helpful. however, with how much olive oil is poured into the pan before adding the dough, parchment paper shouldn’t be needed in most cases!
First few bites are great! Can confirm parchment is the way to go. My bread got mauled trying to get out of the pan. Don’t make my mistake!
Can you use regular flour?
yes, you can definitely use all-purpose flour! you’ll use the same amount. bread flour has a higher protein content which gives the dough a slightly chewier texture and a more airy crumb. but using all-purpose flour works totally fine!
I use the hug protein all purpose flour from Costco for all of my recipes that call for it, including my sourdough. It works fabulously and tastes great.
Hey! I am new to baking could you please share the temperature and oven settings for focaccia, my first focaccia came out golden but inside it was chewy and a but undercooked. I would like to improve my technique.
I made this using bread flour and weighed the ingredients like suggested. I made the dough, let it to the rise with the turns then put it in the fridge and baked it the next day. It turned out fabulous. First time making focaccia and it was so easy! Im excited to try some toppings on it next time. Got quite a few requests for the recipe!
yay so glad you loved this one!! and playing around with the toppings is so much fun!
I have NO idea what went wrong. The recipe was easy to follow and I did everything perfectly. Dough looked and felt fantastic after stretch and folds, after the second rise the dough fell flat and had ZERO air bubbles. After baking it was like a brick. I am disappointed to say the least ?
hi! is your instant yeast expired? even when stored in the fridge, instant yeast can lose peak quality after 4 months, so i’d check there first.